Read and Write to Ntfs on Mac
How To Read and Write To Microsoft NTFS Drives on Mac
Summary: Guide to enable NTFS writing on Mac. The safest and virtually constructive method is to download iBoysoft NTFS for Mac to read and write to Microsoft NTFS drives on your Mac.
Cross-platform incompatibility has been a huge roadblock for people who have to motion back and along betwixt Windows and macOS, particularly when you need to share files betwixt Windows and Mac using an NTFS drive.
After you connected an NTFS drive to the Mac, yous establish that you lot could view the files stored on your NTFS-formatted drive on Mac, simply you couldn't edit, rename, copy, paste, delete, move or create files on it.
Is there a way to read and write to NTFS drives on Mac? The answer is yes. Keep reading to know unlike methods in this mail service.
Iii ways to write to NTFS drives on Mac
In this section, yous will learn how to write to NTFS drives on Mac. Each method has pros and cons. After reading, you can cull the method that suits your case all-time to write to NTFS drives on Mac. Now, let's explore these 3 methods one by one, including:
- Cost-effective NTFS for Mac software
- Complimentary NTFS drivers for Mac
- Apple tree's native NTFS support
Pick 1. Commercial but easy-to-use NTFS driver for Mac
Using paid third-party software is the easiest and fastest manner to enable write support of NTFS drives on Mac. Although costing a little coin, they offering high reliability, fast write speed, excellent compatibility, and free technical support, which yous probably won't get from free NTFS drivers for Mac.
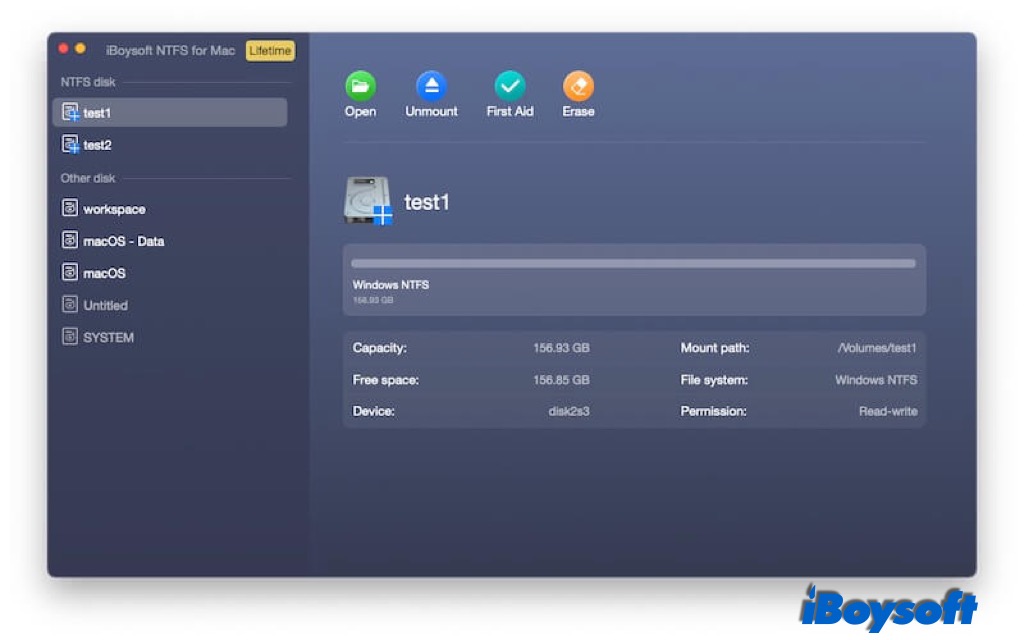
iBoysoft NTFS for Mac is one of the best. It provides fast NTFS write and file transferring speed. Yous won't experience any departure between using an NTFS drive on Mac and other macOS-supported formats. And now, information technology also supports writing to NTFS drives on Mac with M1, M1 Pro, and M1 Max chips.
Best NTFS for Mac - iBoysoft NTFS for Mac
- Read and write NTFS volumes on Mac
- Mount and unmount NTFS volumes
- Repair NTFS file organisation errors
- Erase information on NTFS disks
- Listing and open all attached external drives
- Reformat other file systems to NTFS
- Support macOS 12/eleven/x.15/10.xiv/ten.13
- Compatible with Apple M1, M1 Pro, and M1 Max Mac
There is a tutorial video most how to read-write NTFS drives on Mac with iBoysoft NTFS for Mac.
Steps to read and write to NTFS drives on Mac:
1. Gratuitous download and install iBoysoft NTFS for Mac on Mac.
2. Connect your NTFS drive to your Mac computer.
iii. After your drive is mounted successfully, you tin can manage your drives and read-write to NTFS drives. If necessary, you'll be asked to install an NTFS driver by iBoysoft and enable Organisation Extensions.
There is a free-trail version of iBoysoft NTFS for Mac. Don't lose this run a risk to feel its excellent performance to write to NTFS drives on Mac for free.
Option ii. Gratuitous but complicated NTFS commuter for Mac
Except for paid NTFS write drivers, there are some complimentary NTFS for Mac yous tin choose from. For example, FUSE for macOS is an open-source projection. It can mount NTFS drives in read-write mode.
Although they are costless to employ, the process is very complicated and technical, involving so many command lines and rebooting the Mac. If you want to try such a free program, delight follow the guide very carefully and patiently.
Step 1. Download and install Xcode.
Go to Finder > Applications > Utilities > Concluding and run the following command line: xcode-select --install. And then, Click "install" when yous are asked to install the Apple'due south control line developer tools.
Stride ii. Download and install Homebrew.
Become to the Terminal window and run the following command line:
/usr/bin/ruby -east "$(curl -fsSL https://raw.githubusercontent.com/Homebrew/install/main/install)".
Then, Hit Enter to install it (provide password when prompted).
Note: If yous have installed Xcode and Homebrew before, messages will pop upwardly in Concluding window telling you have installed them before. You just ignore the messages, go on doing the next steps.
Footstep 3. Download and install FUSE for macOS.
Apply default options when installing it.
Step 4. Install NTFS-3G.
Go to Terminal window and run the following command line: mash install homebrew/fuse/ntfs-3g.
Step 5. Disable SIP (System Integrity Protection).
SIP exists to protect the operating system from unauthorized changes.
- Restart your Mac and hold down Control + R immediately until you come across the Apple tree logo.
- Open Terminal from the Utilities menu.
- Run the command line: csrutil disable.
- Hitting Enter.
- Reboot the Mac.
Step 6. Read and write to NTFS on Mac.
- Get to Finder > Applications > Utilities > Terminal.
- Run the following control line:
sudo mv /sbin/mount_ntfs /sbin/mount_ntfs.original sudo ln -s /usr/local/sbin/mount_ntfs /sbin/mount_ntfs
- Hitting Enter.
Note: It is recommended that you enable SIP later on yous finish using NTFS drives on Mac to better protect your Mac. To enable SIP, you just demand to follow the Pace 5 and run command line "csrutil enable" in Terminal window, hit Enter and restart the Mac.
Other than FUSE for macOS, Mounty for Mac, NTFS-3G, SL-NTFS are other free NTFS for Mac. They are free, merely all of them require a good bit of work to install and apply.
Selection 3. Enable NTFS write back up using control line
I bet most people don't know that the Mac operating arrangement includes the experimental NTFS write back up, just information technology is disabled by default. You can run some command lines in Concluding to enable it.
However, Apple tree hasn't officially supported NTFS-writing ability yet. It is proven to be unstable and risky. It may cause deejay abuse and permanent data loss. In case you couldn't access your NTFS drives or lost data from them, try iBoysoft Mac Data Recovery to recover important files.
This solution is not recommended, but if you lot are curious nigh how to enable Apple tree NTFS write back up, follow the steps below:
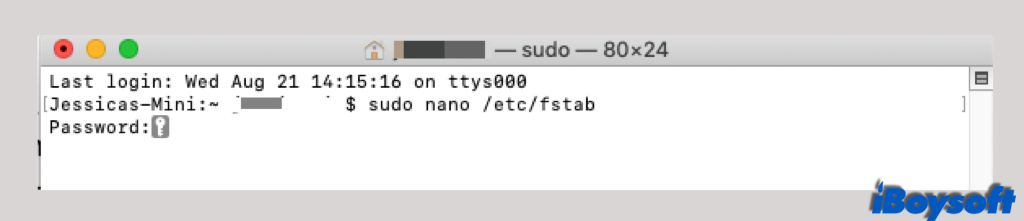
i. Get to the Applications > Utilities > Terminal to launch the Terminal program.
2. Input "sudo nano /etc/fstab" to edit the fstab file (provide your countersign when prompted). No letters will show upwards when you lot type in countersign.
3. Type "LABEL=DISKNAME none ntfs rw,auto,nobrowse" in the editor window for the fstab file and press "Control + O" to write. (Be sure to change the word DISKNAME to the name of your NTFS volume)
Tips: If you take multiple NTFS drives you want to write to, write different line for each NTFS bulldoze.
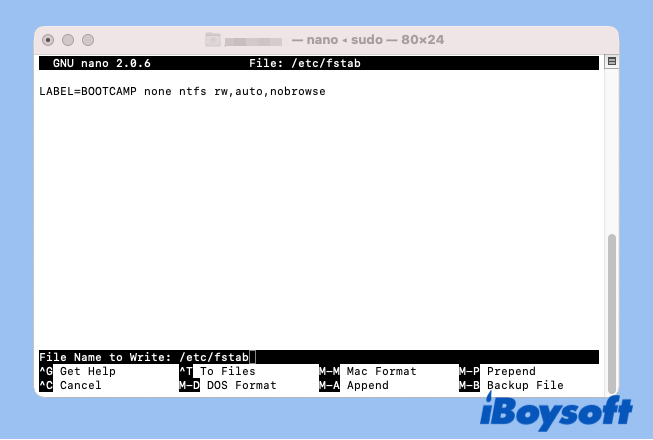
4. Hit Enter and press "Control + C" and and then "Command + X" to get out.
five. Re-connected the NTFS drive to the Mac.
six. Click "Go" at the top left menu bar and choose "Become to Binder".
7. Type in /Volomes and hit Enter.
eight. Notice the NTFS book or bulldoze and elevate information technology to sidebar for easy access.
Tips: If you desire to disengage the change, follow the step 1 and pace 2, then delete the command line. Save your change and exit.
Can macOS read NTFS
Yeah, yous tin read Windows NTFS-formatted USB flash drives, SD cards, memory sticks, and external hard drives without any problem, and NTFS drives on Windows partition created past Kick Camp Assistant are besides supported.
No matter what Mac y'all are using, either a desktop or a laptop, and no matter which Mac operating organization is running on your Mac, macOS, or Mac Os X, yous can read NTFS drives on Mac.
Yous tin view your files by opening them. Files will appear the aforementioned quality as they do on a PC. However, your files will testify read-only or locked beside the file name. You can't make whatsoever changes to those files nor create/salvage/move any files on the NTFS drives on Mac. Sharing files between NTFS drives and Mac looks incommunicable.
That'due south why you demand a Mac NTFS commuter to enable you to read and write to NTFS drives on a Mac, but similar on a Windows PC.
Determination
Writing to NTFS drives on Mac is totally possible. You have several options to choose from - free NTFS drivers, cost-constructive NTFS drivers and Apple'due south native NTFS support.
Complimentary NTFS drivers for Mac and Apple'south NTFS support are complimentary only have extra amount of work to mount NTFS drive on Mac in read-write fashion. They are risky and very unstable. Even though iBoysoft NTFS for Mac is non completely free, it saves you a lot of fourth dimension and effort for its first-class reliability and ease of utilize.
If y'all desire to use external drives for file transferring between Windows and Mac often, it is a skillful idea to format NTFS to exFAT or FAT32. If yous will use this Microsoft NTFS drive on Mac after, you tin also cull to catechumen NTFS to APFS.
About author

Amanda Wong
Amanda is one of the chief columnists at iBoysoft, she loves exploring new technologies and writing technical manufactures focusing on computers, OS, etc., to help people out of problems.
Source: https://iboysoft.com/ntfs-for-mac/read-write-ntfs-drive-mac.html
0 Response to "Read and Write to Ntfs on Mac"
Enviar um comentário